
How To Put Weight On a Fishing Line (Rig a Fishing Pole 101)
Are you tired of the same old boring fishing trips and ready to have a reel-y good time on the water? In this article, we’ll go over all the essential tips and tricks you need to know to rig your fishing line like a pro.
So grab your rod and reel, and get ready to cast off on an adventure like no other. We’ll take you on a journey through the deep sea (or lake, or river, or pond – wherever your heart desires) and show you how to catch the biggest, baddest fish in the whole wide world. And we’re not just talking about the ones that got away – we’re talking about the ones that are so huge, they could swallow your boat whole (okay, maybe we’re exaggerating a little bit, but you get the idea).
Don’t be a chicken of the sea – join us on this wild ride and learn how to rig your fishing line like a boss. We promise it will be a catch of a lifetime.
Step 1: Gather your equipment, and fishing weight sinker
Before reeling in a whopper, you’ll need to ensure you have all the right gear. And trust us; there’s a lot more to it than just a fishing rod and a bucket of worms (although those are important too).
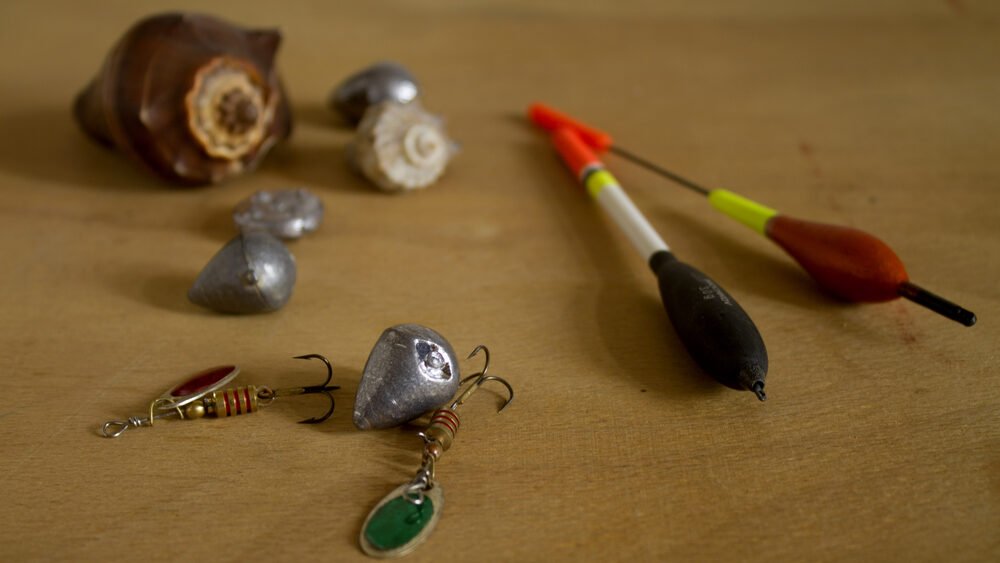
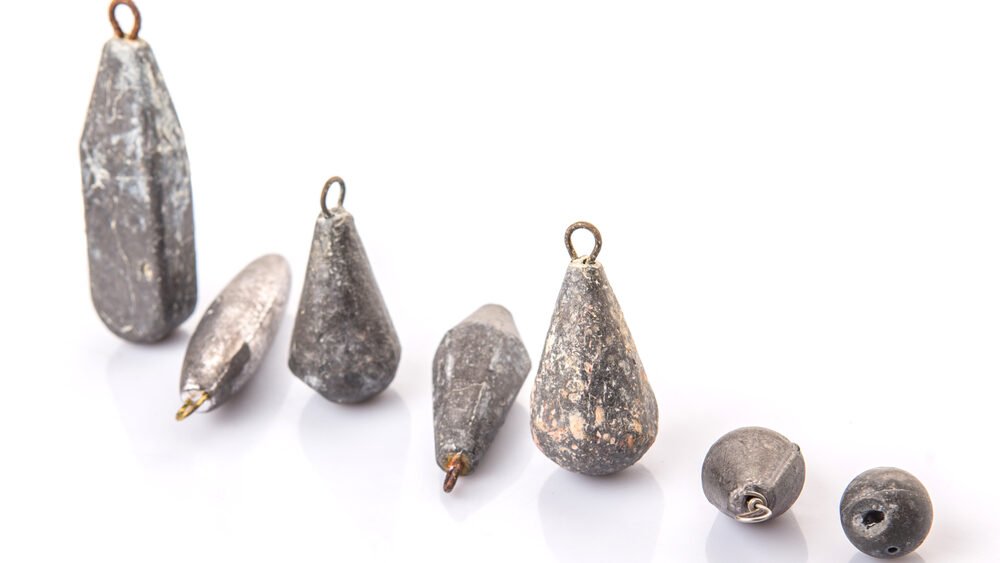
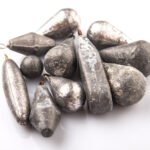
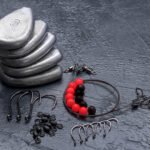
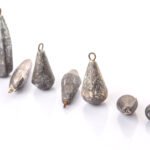
First, you’ll need weights to help get your bait or lure down to the fish. There are many sinker options: split-shots; rubber-core; sliding sinkers; worm weights; walking sinkers; coins; pyramids; balls; bar weights; bananas; bullets; drop-shots, barrel weights, slinky weights, hollow core lead wires, and more. Just pick the one that feels the heaviest (kidding, they all feel heavy).
Next up are the hooks and lures. These little guys are crucial for snagging your dinner (or releasing it back into the water if you’re not hungry). There are three main hooks: circle hooks, j hooks, and treble hooks (which look like mini anchors with three hooks). There are also many types of lures in the different fishing categories. Each hook and lure has its unique shape and purpose, so choose wisely.
Last but not least, you’ll need a fishing line connecting you to the fish (figuratively speaking). There are three main types of fishing line to choose from: monofilament, fluorocarbon, and braided. Each has pros and cons, so pick the one that floats your boat (sorry, I can’t help it).
Now that you’ve got all your gear, it’s time to consider what kind of fish you’re after. Different fish require different equipment, so consider the fish’s size and strength, the water’s depth and clarity, and the bait or lure you will use. You’ll be well on your way to landing a lunker with the proper setup.
Step 2: Attach a weight to your line
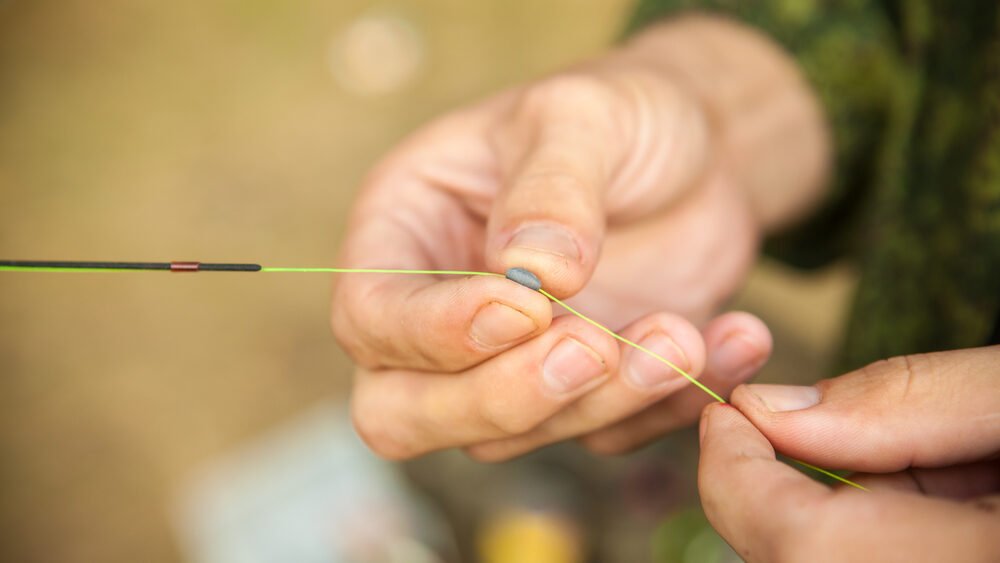
Now that you have all your gear, it’s time to use it. First up, attach the weight to your line, which may seem like a no-brainer, but trust us, there’s more to it than just tying on a sinker and calling it a day.
A sinker slide allows the weight to move freely up and down the line, making them ideal for fishing in currents or at varying depths. Just slide the weight onto the sinker slide, and you’re ready.
You can also use a swivel, which prevents your line from twisting. It is helpful when using multiple hooks or lures and helps prevent tangles, which is a bonus.
Now, let’s consider the positioning. If you use a floating bait or lure, you’ll want to place the weight close to the hook to suspend it at the proper depth. But if you use a sinking bait or lure, you’ll want to put the weight farther away from the hook, so the bait sinks slower.
You can adjust the distance between the weight and hook based on the depth and type of water you are fishing in. Try to experiment with various setups to find what works best for you, or ask an experienced angler friend.
The key is balance, so your lure looks natural and irresistible to the fish because it won’t bite if something smells fishy (okay, I’ll stop now).
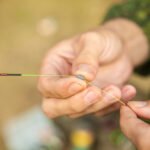
Step 3: Tie on your hook

Now that you’ve sorted your weight, it’s time to add the finishing touch: the hook. Choosing the right hook can make all the difference when catching fish, so it’s essential to get it right.
First, you’ll want to consider the size of the hook. A hook that’s too small won’t be able to hold onto your bait or lure securely, and if it’s too large, it might be intimidating to the fish (or just plain ineffective). So it’s crucial to find the Goldilocks of hooks – not too big, not too small, but just right. To do this, you’ll want to match the size of the hook to the size of the bait or lure you are using and the size of the fish you are targeting.
Second, we need to look at the style of the hook. There are different hook styles for various purposes, so it’s essential to choose the right one for the job. For example, circle hooks are great for catch-and-release fishing, as they tend to hook the fish in the corner of the mouth rather than the gut, making it easier to release them without causing too much damage. On the other hand, J hooks are more traditional and work well for various fishing situations. With their three prongs, Treble hooks are perfect for lures that need extra holding power.
Now that you’ve chosen the perfect hook, it’s time to tie it onto your line. One reliable and easy-to-tie knot for this purpose is the fisherman’s knot. To tie a fisherman’s knot, start by threading the end of your line through the eye of the hook. Then tie an overhand knot around the standing line, pulling tight to secure the hook. It’s simple, quick, and holds up well under pressure.
Step 4: Add any additional tackle to fishing rig
Now that you’ve got your weight and hook set up consider adding more tackles to your rig. Various gadgets and gizmos can help you fine-tune your setup and increase your chances of success on the water.
One popular piece of tackle is a float. These little bad-boy buoys help keep your bait or lure at a specific depth, making it easier to target fish at different levels in the water column. They also make it easier to see when you get a bite, as the float will start bobbing up and down. Just tie the float onto your line using a slip knot or a swivel, and adjust the distance to the desired depth.
Another handy-dandy piece of tackle is the leader line, which is a separate line you attach between your main line and your hook. It adds an extra layer of protection, which can be especially helpful if you’re targeting big, strong fish that fights you till the end. The leader line also prevents tangles and snags, providing extra separation between your main line and the hook, but you need to use it properly.
Regardless of what other tackle you choose, you must adjust the distance between your weight and hook based on the depth and type of water you are fishing in. You’ll want to use a longer distance between the weight and hook in shallow water to keep your bait or lure off the bottom, which looks more natural and attractive to the fish. But in deep water, you’ll want to use a shorter distance to get your bait or lure down to the fish quickly, and it will help you target bottom-dwelling species, like catfish or bass.
Common tackle mistakes to avoid

When rigging your fishing line, beginners tend to make a few common mistakes. One of the most common is using too much or too little weight. Using too much weight can make it challenging to feel bites and tire out the fish more quickly, whereas using too little weight can make it hard to get your bait or lure down to the correct depth.
You can avoid common mistakes by focusing on the depth and the water conditions you are fishing in and the size and style of bait or lure you are using. Try several weights to find what works best for you, and be prepared to adjust your setup as needed.
Another mistake is to use the wrong size or style of hook for the type of fish you are targeting, such as too small or too large or one meant for a different kind of bait or lure. To maximize your chances of success, choose carefully and be conscious of the details.
Once you have had some practice, the whole process will become more intuitive and feel like second nature soon.
Step 5: Cast your line

Now that you’ve got your rig set up and ready to go, it’s time to cast your line and start fishing. But before you go flailing your rod around like a maniac, you better understand the proper technique for casting, or you’ll be in deep water (pun intended).
Let’s try explaining how to cast a line with words:
- Hold the rod firmly but not too tight. You want to be able to control the rod but not squeeze it to death.
- Use a smooth, fluid motion to swing the rod back and forward, releasing the line as you do so.
- Aim for a spot beyond where you want the bait or lure to land, and use the rod’s power to control the cast’s distance.
It might take some practice to get the hang of it, but don’t worry – we’ve all been there, and you’ll get the hang of it quickly.
Keep in mind: Be aware of your surroundings when casting. Make sure there are no people, pets, or other obstacles in the way of your cast. Accidentally hooking someone or something is not fun (from personal experience, I don’t recommend it!)
So go ahead, and CAREFULLY give it a try. I don’t expect you to get it right on your first try, as it takes practice.
Step 6: Reel in your line

Congratulations, you’ve cast your line and hopefully haven’t hooked anyone. Sit back, wait for the fish to bite, keep an eye on your line, and be ready to reel in at any moment.
To reel in your line:
- Yank the pole to set the hook, but not so hard that you break the line.
- Use the handle on the reel to rewind the line onto the spool, taking up any slack as you go.
- Keep the rod tip pointed downward to help absorb sudden jerks or pulls from the fish. If the fish is fighting hard, you can use the drag system on the reel to apply resistance and tire out the fish.
- Be careful not to apply too much pressure, as this could cause the line to break.
When reeling in, the most important thing to remember is always to pay attention to the line to detect bites and react quickly. Keep an eye on the tension in the line, and be ready to strike (or set the hook, as they say) at a moment’s notice. With some practice, you’ll be reeling in the big ones in no time.
Also, remember: “Cast your cares on the LORD and He will sustain you” (Psalm 55:22).
In other words (or in my lousy interpretation): Go fishing and cast your anxieties, worries, and concerns out with the lure, and good things might come from it.
Frequently Asked Questions: Put Weight on a Fishing Line
Here are some common beginner questions about how to rig a fishing line.
Do fishing weights go above or below the hook?
Place weights below the hook if you use a floating lure and above the hook for a sinking lure.
How do you tie a weight onto a line?
A good knot is an overhand knot, often used to tie hooks. You can also use a sliding sinker knot or a non-slip mono-loop knot to let the weight slide along the line.
How much weight should I put on my fishing line?
Start with 3.5 g for split shot weights in shallow water, and add or remove weight if the line feels light or heavy.
How to put Split Shot Weight on a fishing line:
Use a split shot weight for fishing in less than 6 ft deep water, as they’re great for catching fish in ponds, lakes, and rivers.
Position 1 or 2 weights 1-2 ft from the hook, with a combined weight of 1/8 ounce for shallow water.
Pinch the weights onto the line with needlenose pliers or your fingers, being careful not to squeeze the sides completely closed.
Tug on the line to ensure the sinker doesn’t move by pinching the opposite side to release it from the line.
How to put a rubber core sinker on a fishing line
Use rubber core sinkers to add more weight quickly and fish in deeper water; they’re easy to attach and remove without untying any knots.
Attach the sinker about 2 ft above the hook to help the bait float and make it more visible to fish.
Push the line into the slot on the sinker and twist the rubber ends in opposite directions to secure it to the line.
To remove or reposition the sinker, untwist the rubber and gently pull the line out.
How to put a sliding weight on a fishing line
Use sliding sinkers to reach the bottom of the water and keep the bait just below the bottom. They come in different shapes and weights, egg sinkers for windy conditions, and bullet sinkers for bigger fish in deep water.
Slide the sinker onto the main line running back to your reel, and use a good line for the type of water you’re fishing in.
Tie the main line to a swivel using a uni knot, and use a stop bead if the sinker can slide over and off the swivel.
Attach a leader with your hook and bait to the swivel using a uni knot and a clinch knot, and the leader will float higher than the sinker and be less likely to get caught in weeds.
How to put a bomb weight sinker on a fishing line
Use a bomb weight for deep water or strong currents fishing.
Form a 4 inch-loop at the end of a leader line.
Tie 2 overhand knots to secure the loop in place.
Trim off any excess line sticking out from the knot.
Feed the loop through the ring on the weight.
Pull the loop over the weight and pull it tight to the line.
Attach the weighted line to a three-way swivel on your main line.
Tie a uni knot to connect the end of the weighted leader to one of the swivel’s eyelets.