
How to String a Fishing Pole: Assembly, Attaching, Tips, Tricks & FAQ
Hi, fisherpeople. Welcome to the ultimate guide on how to string a fishing pole that will have you hooked (pun intended) from the rod handle to the tag end.
Imagine this:
- You’re standing at the edge of a tranquil lake.
- The sun is shining.
- The birds are chirping.
- You’ve got your brand-new fishing pole in hand
- You’re ready to reel in the big one
- But wait, there’s a problem – you have no idea how to string the darn thing
Don’t let this be you. With our step-by-step guide, you’ll be able to string your fishing pole like a pro in no time.
So grab your rod, line, pliers, and a sliver of curiosity, and let’s get ready to cast off into the exciting world of fishing pole stringing!
The importance of properly stringing your fishing rod
It would be best if you strung your fishing pole the right way so you can cast further and with higher accuracy, allowing you to toss into the secret hiding places of the trophy fish you’re dreaming of. Do it wrong, and you’ll end up frustrated without being able to control your tangled-up mess of a pole.
Another thing to consider is the lifespan and quality of your fishing rod. If you want it to last long, you must string it correctly. Too loose or too tight may damage the guide eyes or reel seat. And if you use the wrong line type, you can end up with breaks and tangles.
Before heading out, we will choose the right line that fits our fishing needs and string our poles properly. So let’s go over choosing a fishing line and stringing your pole.
Identifying the Parts of the Fishing Rod

Before we dive into the fun part, let’s identify all the parts and see how they function, and then we’ll assemble and string the line around them. These are the parts of our fishing rod:
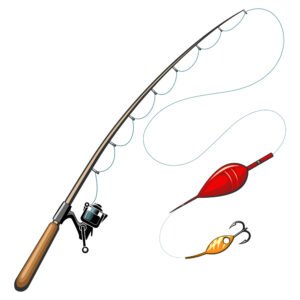
- The rod: you know, that long and thin part you hold onto when you cast the line. There are many different types, such as spin fishing rods, spin cast or casting rods, telescoping fishing rods, fly fishing rods, ultralight fishing rods, surf fishing rods, and trolling rods. They are made from various materials and vary in length and function, but for a beginner, any type of rod is suitable to get started.
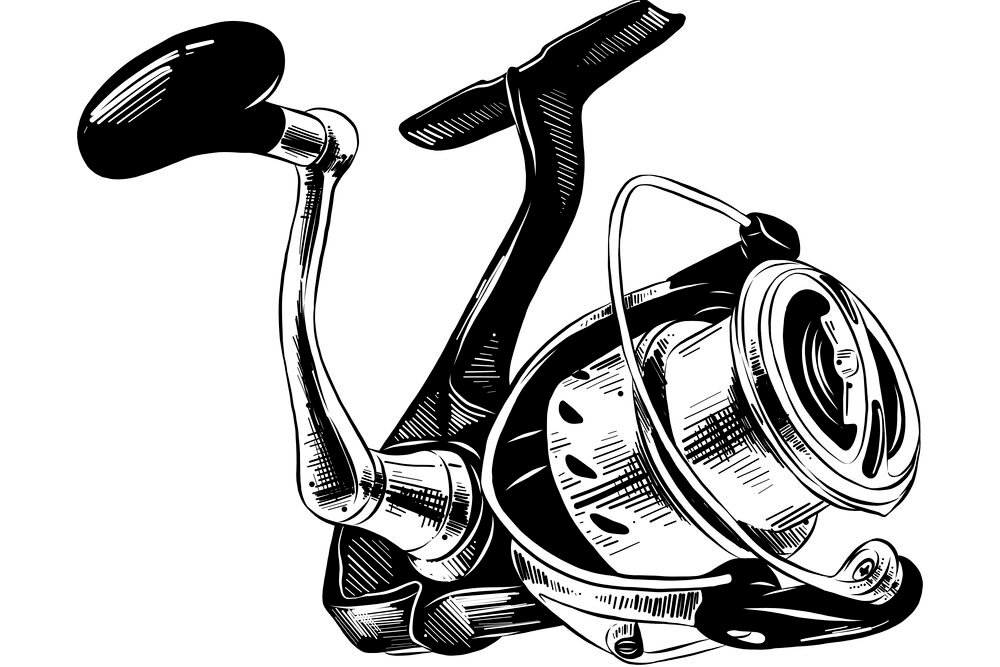
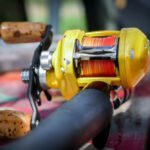
- The reel: that’s the round and sometimes cylindrical part where the excess line is stored. It consists of several components: the drag adjustment, brail arm, line roller, spool, body, foot, and handle. When you cast the line, it retrieves from the reel. Once you stop letting out the line, it holds the line at the length until you start turning the reel handle which spins the line roller while dragging in the line. In other words, when you “reel” in your fish, the line is pulled back onto the reel. There are a few different reels, such as fly fishing reels, conventional reels, spinning reels, spincast reels, and baitcasting reels. Again, they have various use cases, gear ratios, brake systems, advantages, and disadvantages, but for now, any type will do.
- The lure: is often shiny and colorful, resembling a tasty fish treat in water. Its sole purpose is to entice fish to bite it and then attach it to the hook. Depending on which type of fish species you are targeting and the water conditions, you can switch out the lures of different sizes, weights, colors, and functions. Some lures may wobble or spin when pulled through the water, making it look like they swim, attracting the attention of the fish the angler wants to catch.
- The line: it’s the long thin strand of cord that attaches to the fishing pole in one end and with the lure or hook in the other. A line consists of a long thread of nylon or other synthetic polymers, and its essential attributes are its material, length, weight, thickness, strength, and stretch. Lines come in monofilament and multifilament (braided) types. The advantage of braided over mono is that it has more strength in the same diameter, or the same strength in a lower diameter, along with more line on a reel, but can break by quick pulls as it has less stretch, and it is also more visible in the water.
- The ferrule: the parts that connect the rod sections are called ferrules. These rod joints are hollow, where you insert one part (the male ferrule) into another part (the female ferrule) and fasten them tightly.
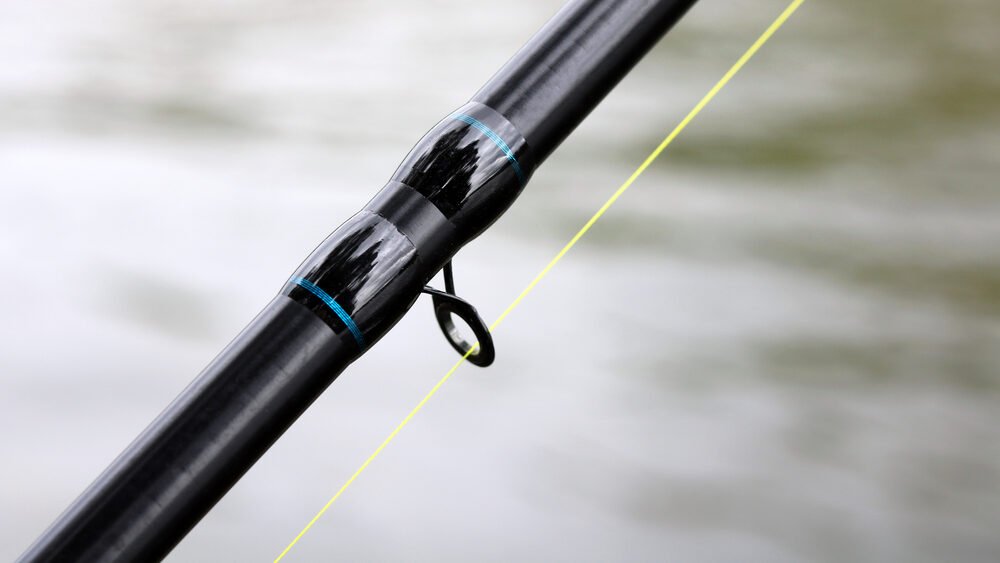
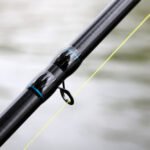
- The guides: These smooth rings along the rod allow the line to slide through as you cast and retrieve it, and they guide the line to avoid it tangling.
- The butt: this is the thickest end of the rod. It is heavier and sturdier than the rest of the pole, so it’s easier to balance and control the rod while fishing.
- The handle: The spot where you grip and hold the pole most comfortably while fishing. The material is often EVA or cork with a non-slip feature.
Got all that? Great! Now that you’re familiar with the fishing rod parts, let’s move on to the fun stuff – assembling it!
Assembling the Fishing Rod and Reel
Who’s ready for a fishing trip? Let’s put the parts together. Don’t worry; it’s not at intimidating as it sounds.
Once you have all the pieces we listed above, let’s put them together by looking at the manufacturer’s instructions, which you can find in the manual or on their website.
Some rods have locking mechanisms such as screws or clips that keep the sections of the rod tightly together and won’t disassemble into pieces when you cast it.
Attach the different sections by inserting the ferrules into each other and slowly rotate them until they feel tight, but don’t force it cause it may break. If something doesn’t fit, there’s a chance you are doing something wrong, so double-check the instructions.
A quick tip: Use human body oil to lubricate the ferrules. If the ferrules have too high friction and seem like they should fit but do not, you can gently rub your fingers on a naturally oily place of your skin, such as over the pores on the sides of your nose, and then rub your fingers on the tip of the male ferrule. Applying this tiny amount of skin oil gives a thin layer of lubricant that is just enough to help the joints fully rotate into place but not so much grease that it slides out while you use it.
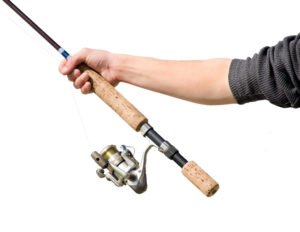
Once the rod pieces are perfectly attached, it’s time to attach the reel, which should be a straightforward process by following the manufacturer’s instructions. Just make sure it is mounted the correct way.
You want your reel handle pointing to the left side if you are right-handed. You should always use your dominant hand to grip and hold the pole and use your other hand to swivel the reel.
If you are right-handed, holding the pole with your right hand and swiveling the reel with your left hand, the reel handle should rotate counter-clockwise. If you are left-handed, holding the rod with your right hand and swiveling the reel with your right hand, the reel handle should turn clockwise.
Some spinning reels have a reversible handle and an anti-reverse switch on the base where the handle connects. These functions allow you to switch a left-handed reel into a right-handed reel and vice versa and change the rotation.
Now that you have successfully assembled your fishing rod, let’s move on to prepping the pole for stringing.
Prepping the Fishing Reel, Fishing Pole, and Fishing Line
Here are a few steps to get ready:
- Remove any hook attached to any line you use, so you don’t accidentally hurt yourself.
- Remove the old line, if any. You cut the line as close to the reel as possible using scissors or a line stripper.
- Inspect the guide eyes and reel seat to ensure they are flawless. Remove any rust or dirt with a gentle brush or washcloth, and if the rust is terrible or has significant damage that you can’t fix, consider replacing the parts. If not, they may break on your next fishing trip, ruining all the fun.
- You can lubricate the guide eyes and the reel seat where the line slides over to ensure they slide smoothly with less friction. You can use silicone lubricant or reel oil for this purpose.
Now we’re prepped and ready to attach the new fishing line onto the reel.
Threading the end of the line through the guide eyes
Time to learn how to string the line through the guide’s eyes. Don’t worry; it’s not as difficult as it seems. Stay with us a little longer with patience; we’ll be done in no time (and you’ll have mastered a new skill).
- The easiest way to position the rod is to gently lay the pole on a soft surface like a lawn, bed, or sofa, where you can comfortably work it, and nobody will step on it.
- Start by taking the end of the line and placing it at the top or tip of the fishing pole and through the end guide eye from the top.
- Continue passing the line through each guide’s eye down the pole.
- Make sure the line is smooth and straight and doesn’t tangle.
To avoid tangles, you can use a line winder, which wraps the line onto the reel keeping the line tight. Also, hold the tension continuously while you’re working the new line, and prevent it from touching itself or crossing over itself.
Since this step was easy, let’s move on to the next step and attach the line to the reel.
Attaching the Spool Line to the Reel
The method for attaching the spool will depend on the type of reel you have. There are open and closed reels, and closed reels are called close-faced or spincast reels, where a spool cover hides the spool. Open- and spinning reels are more straightforward, while closed reels require another technique to attach the line.
Next is a detailed step-by-step process for spooling new fishing line onto a spinning or baitcaster reel, including how to open the bail, run the line through the guides, tie the line to the spool, close the bail, load the line onto the reel, and secure the line. Let’s go.
How to spool an open reel, spinning reel or baitcaster reel
Here are the steps to attaching the spool line onto your reel:
- Open the bail by lifting the wire arm on spinning reels and remove the old line, if any.
- Run the new line through the line guides on the underside of the rod or, for baitcasters, through the guide hole to the bail.
- Tie the end of the line to the spool with an arbor knot and close the bail by lowering the wire arm.
- Note the direction of the bail arm’s rotation, and load the line onto the reel in the same direction.
- Keep the line taut between your thumb and index finger, and turn the rod’s handle 15-20 times, checking for knots or tangles.
- Fill the rod’s spool until it’s almost at capacity, leaving about 1/8 inch below the rim. Cut the line, secure it with a rubber band, or wrap it around the reel’s tab.
Here’s how to tie the arbor knot on an open reel:

- Wrap the fishing line around the arbor
- Form a loop around the standing part and pass through the tag end.
- Tighten the knot and loop the tag end around itself again.
- Then pass it through the loop to tighten it.
- Pull the line tightly to jam both knots to secure the arbor.
There are also other knots, such as the uni- and double uni knots. Sometimes the reel manufacturer recommends a specific knot which you may find in the manual instructions.
How to spool a closed reel (spincast reel)
For closed reels and spincast reels:
- Unscrew or pull the spool cover off the reel. If screwing doesn’t work, there may be a button you can press to pop it off.
- If there is any old line, unwind it by spinning the handle.
- Push your line through the hole in the spool cover cap, an important step, or you can’t get the cap back on later. But wait to place the cover back on. Leave the reel open with the line going through the cap.
- Wrap the line around the spool in the direction that the reel rotates, wind the line around the spool’s hollow twice and tie it in place with a slip knot, clinch knot, or arbor knot.
- Pinch the line between your thumb and index finger, apply pressure to keep it from tangling, and crank the handle to load the line.
- Spool the line until the reel is almost full, leaving about 1/8 inch below the spool’s rim, and secure the spool cover.
- If you left the cover off, unwind the thread, spool the line through the cover, and onto the reel.
- Cut the fishing line off the spool beyond the tip’s end, avoiding the line hanging from the line guides under the rod.
Regardless of your reel type, it’s crucial to ensure the line is securely attached, so use a knot suitable for your type of line and reel.
That’s it, and now you know how to string a fishing pole and spool a reel! It’s time to take it out for a spin (or a cast) and see what you can catch with it.
Additional Fishing Tips and Tricks
- You can use a line winder to make it easier to put a line on your reel, prevents tangles, and speeds up the whole process.
- You can use different types of lines for different types of fishing, water conditions, and which species you want to catch.
- Experimenting with different types of lines can help you figure out what works the best
- Take advice from expert anglers who have years of experience. They tend to know what makes the fish bite and what doesn’t.
- Be patient, and you’ll soon be a pro fishing pole stringer. Happy fishing.
Final Checks and Maintenance

These are a few critical final checks to ensure everything is in working order.
- Test the line tension to ensure it’s appropriate for the type of line and reel and to avoid damage to the rod and reel.
- Store the fishing pole vertically in a cool, dry place, away from direct sunlight and humidity, to protect it from damage.
- Proper maintenance keeps your fishing gear in good condition and ready for use whenever you need it.
FAQs About How to String a Fishing Pole
How do I know which line type is best for my fishing pole?
Consider the type of fishing you will be doing, the weight and action of your rod, and the strength and sensitivity of the line.
Consult the manual or manufacturer’s website for recommendations, and seek advice from a fishing expert or store employee.
How do I fix a tangle in the line?

Try gently pulling the line to straighten it out, or use a tool such as a line stripper or hook to untangle the knots gently.
Avoid drawing too hard, as this can damage the line or even break the rod. If the tangle is severe, cutting the line and rethreading it may be necessary.
How often should I replace my fishing line?
The frequency of line replacement depends on the type of line, the amount of use, and the conditions it is exposed to. The Monofilament line should be replaced every few months to a year, depending on the amount of use and the harsh conditions. The braided line lasts longer, but you should inspect it often for signs of wear or damage. The Fluorocarbon line is more expensive, but it is also more durable and can last several seasons. Ultimately, it is essential to regularly inspect your line for frays, knots, or other signs of wear and replace it as needed.